How to migrate from Wordpress to Phenomic
I recently decided to move my WordPress Blog to a static site generator. You can read about the reasons here. I’m using phenomic as my static site generator which takes markdown posts and converts them to HTML and embeds them in a web page that is fully customizable with React components. However, my old posts in WordPress are still written in HTML and use WordPress Plugins, and I had to migrate them from WordPress to phenomic. Here’s how I did it.
Convert WordPress posts to Markdown
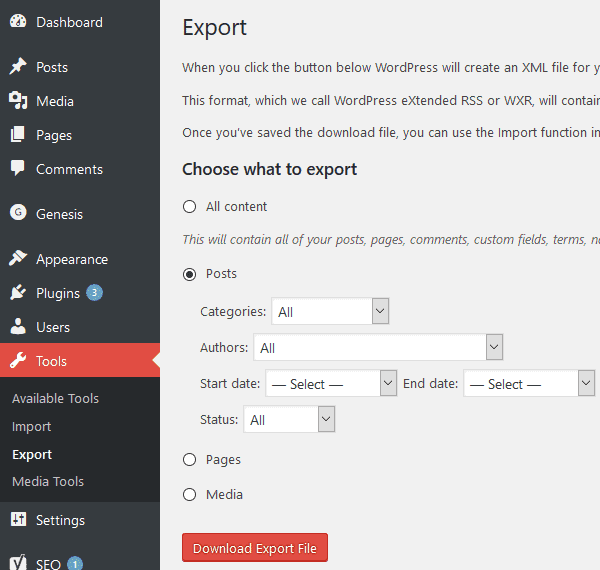
Export Posts from WordPress
You don’t want to do this by hand and luckily you don’t have to. The first step is to export your WordPress posts so they can be processed by other programs. You can do that by going
to your Wordpress Dashboard and selecting Tools - Export - Posts. Download the xml file.
Convert Posts to Markdown
The .xml file you just downloaded contains all your posts in HTML and there are several HTML to Markdown converters. The one I used (which was the only one that worked)
is Exitwp. You ‘ll need Python 2 to run it, so if you haven’t installed it, go ahead and do so. After that, you can follow
the installation instructions for Exitwp (pip install --upgrade -r pip_requirements.txt). Then put the wordpress.xml file you downloaded into the wordpress-xml folder.
Running python exitwp.py should now convert all your posts to Markdown and create files in build/jekyll/*domain*/_posts.
Adjusting the Parser
The python parser creates jekyll compliant Markdown posts which are similar to phenomic’s post types. However, you might still want to adjust some settings to cater
to your specific posts’ HTML which might depend on the WordPress plugins you used. You can define custom RegExp to apply in exitwp.py - Mine looked like this:
body_replace: {
  #'<pre.*?lang:(\w*?)\W.*?>': '```\1\n',
  '<pre.*?>': '```javascript\n',
  '</pre>': '\n```\n',
  '<code.*?>': '`',
  '</code>': '`',
  '\[latex\]': '\(',
  '\[/latex\]': '\)',
  '\[caption[\s\S]*?\]': '',
  '\[/caption\]': '',
}
You can also adjust the frontMatter of your posts by reading through exitwp.py and editing the corresponding lines. For instance, I added phenomic’s route parameter so no
links are broken by phenomic, and also the disqus_identifier of the standard Disqus WordPress plugin so no comments will be lost.
yaml_header = {
    'title': i['title'],
    'route': '/' + i['link'][len('http://cmichel.io/'):],
    'author': i['author'],
    'date': datetime.strptime(
        i['date'], '%Y-%m-%d %H:%M:%S').replace(tzinfo=UTC()),
    'slug': i['slug'],
    'disqus_identifier': i['wp_id'] + ' http://cmichel.io/?p=' + i['wp_id'],
}
In the end, you should have automated most parts of the posts, so the only thing you need to fix manually is some bad formatting. Also remember that you can always have HTML tags in your Markdown which will then simply pass through your parser and end up unchanged in your final HTML file.
Replace Image URLs
WordPress stores its images in wp-content/uploads/*year*/*month* and your <img src='...' /> elements in your converted posts will still point to this path.
If you don’t mind the chaos, you can of course leave the images there, but I wanted to link the images in a clean way to point to phenomic’s assets folder.
So log into your FTP account, download wp-content/uploads and put its contents into the content/assets folder of phenomic.
To link the src attribute of the img elements to this new folder I found it easiest to just search all files for content/uploads and replace the string with
assets. This can easily be done in a single click with a good text editor like Sublime Text, Atom, or my current favourite Visual Studio Code.
Run npm start now to check if the sites are parsed correctly by your static site generator.

